
Technique · Guide
A convincing sky begins with the relationship between its light and dark shapes, not an outline around every cloud.
7 min read
To paint skies and clouds in watercolour, decide where the largest lights belong, carry the sky colour around them, and give the clouds only the shadows and edges they need. The difficult part is often leaving a useful shape alone before the wash starts to dry unevenly.
A sky can be the subject or the space around something else. That distinction should change how much contrast, detail and paper you give it. This guide concentrates on daylight skies and broad cloud masses, rather than a separate recipe for every kind of weather.
At a glance
Find the whole arrangement first. Look at the spaces between clouds as carefully as the clouds themselves.
Reserve the brightest shapes. Not every cloud needs to be white, but a light covered by a blue wash cannot be assumed recoverable.
Use more than one kind of edge. A firm boundary can describe a sunlit cloud; a soft transition can let another part merge into the sky.
Keep shadows inside the form. A grey line around a white shape describes an outline, not necessarily a cloud turning away from the light.
Stop when the sheen breaks. Adding wet paint or water at the damp stage risks a backrun rather than a soft blend.
Decide what the sky is doing
Before mixing, choose between a quiet sky supporting the landscape and a sky whose movement is the main subject. A low horizon gives the sky room, but space alone will not make it interesting. It still needs an arrangement of unequal shapes and a reason for the eye to move through them.
Look for one broad movement: a long opening between cloud banks, a diagonal sweep, or a large light mass balanced by smaller fragments. Simplify the rest around that. Repeated clouds of the same size, equally spaced, can look like a pattern laid over the picture rather than weather extending through it.
If you are working from a photograph, choose the crop before the cloud details. The guide to painting from a reference photo explains how to separate useful observations from decisions the photograph cannot make for you.
Read the light before choosing the grey
Identify the lightest area, the main cloud body and its darker parts. These need not become three separate painted layers. They are a way to understand the relationships before committing colour to paper.
A cloud’s underside is often darker, but do not give every cloud a standard grey base regardless of the reference. The direction and colour of the illumination matter. The World Meteorological Organization’s cloud atlas describes cloud colour as strongly dependent on the light reaching it; sunlight and blue skylight can produce different appearances.
Keep that observation practical: compare the shadow with the surrounding sky. Is it darker, warmer, cooler, or barely distinguishable? A shadow that is only slightly darker may be enough to make the light part of the cloud read clearly.
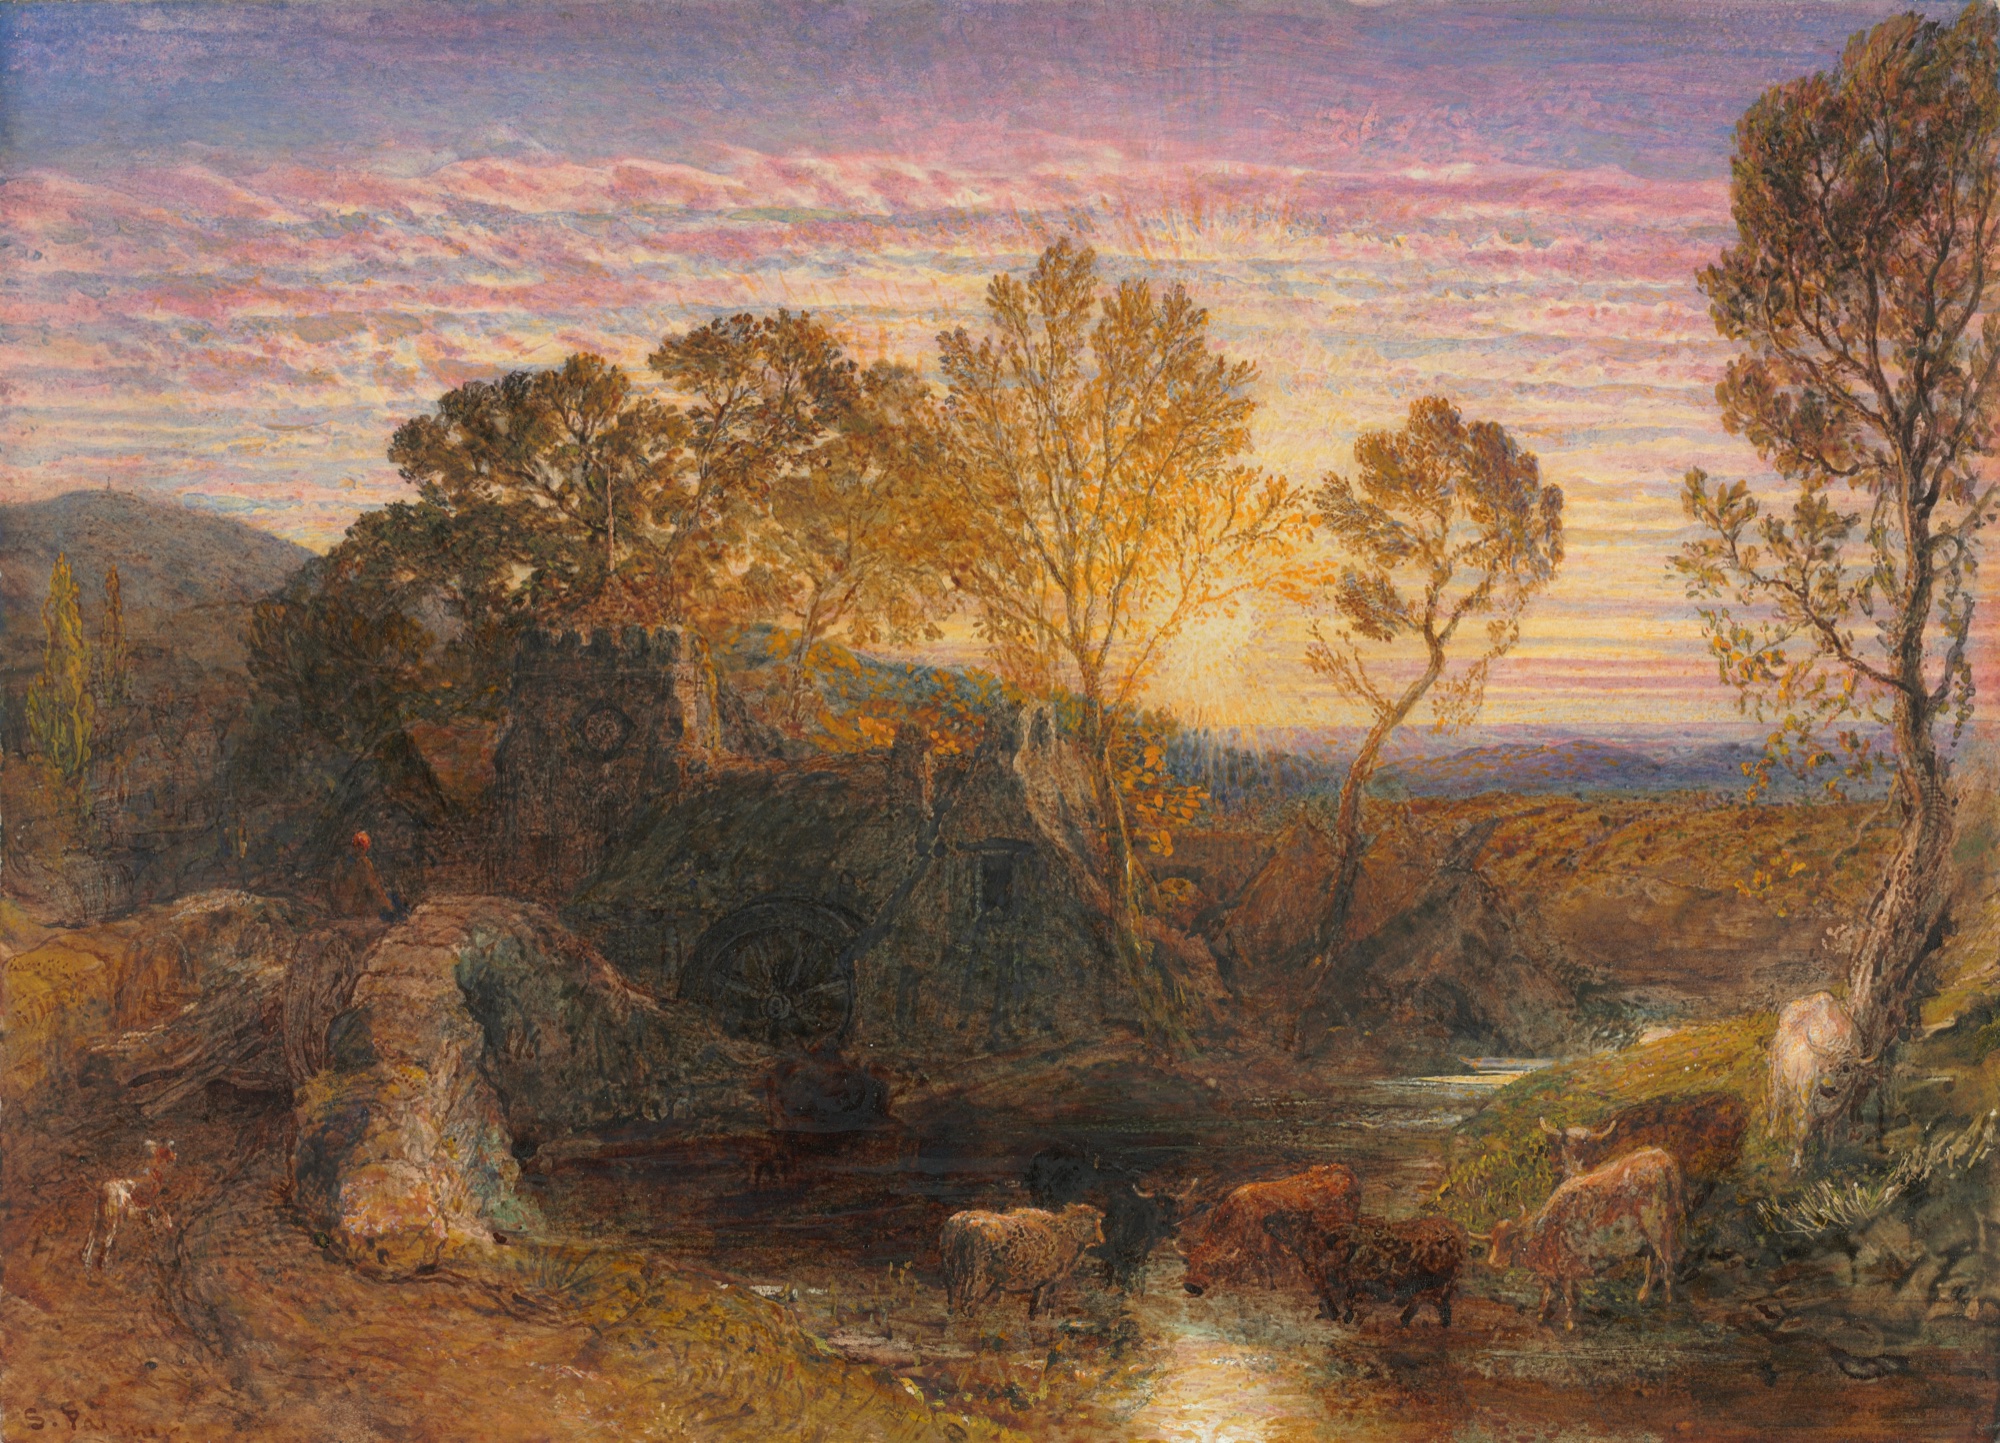
Samuel Palmer, The Golden Hour, 1865. Pink and violet cloud bands stretch across the sky, with golden light between them. Colour and the spaces between clouds give the sky its rhythm.
Watercolour and gouache with graphite and scraping. The Cleveland Museum of Art, The Severance and Greta Millikin Purchase Fund, 2009.3. Museum record. Public domain / CC0.
Choose what stays light
For a transparent approach, leave the brightest cloud areas unpainted and put colour around them. Other cloud areas can receive a pale wash. This gives you more room to describe form than treating each cloud as either untouched white or dark grey.
Make only enough pencil marks to place the large masses. Drawing a scalloped boundary around every cloud can encourage the brush to trace it. Instead, note the top of the main mass, its broad direction and the important gaps beside it.
Planning the lights is different from recovering them later. If preserving paper is new to you, start with how to keep whites in watercolour. For broad cloud shapes, painting around the light is a useful starting point without making masking fluid part of the setup.
Match the wash to the sky
| Sky you are painting | Useful starting decision | What to avoid |
|---|---|---|
| Clear sky with a gradual value change | Carry one connected graded wash across the area | A series of separate blue stripes |
| Distinct pale clouds in blue sky | Reserve the light masses and connect the blue spaces around them | Outlining each cloud before filling the gaps |
| Broad grey cloud cover | Organise a few related grey shapes with restrained value changes | Adding small dark marks everywhere |
| Broken, changeable cloud | Vary the size of the openings and the firmness of their edges | Giving every fragment the same shape and contrast |
A graded wash suits a smooth change in strength. Follow the observed direction of that change rather than automatically making every sky dark at the top and pale at the horizon.
For a clouded sky, the blue areas are shapes in their own right. Work across the arrangement, joining those that belong together, rather than finishing one cloud and then starting its neighbour.
Paint around clouds without drawing blue outlines
Mix enough sky colour before beginning and use a brush that can carry a broad stroke. On dry paper, place part of the boundary with the brush point or edge, then draw the colour away into the larger sky area. Keep moving through that area instead of returning to trace the boundary.
Where you want a soft transition, prepare the receiving area with clean water so it has an even glossy sheen, without standing puddles. Let the sky colour meet that wet area. Keep the centre of any white you must preserve outside the wet connection, since colour can travel through it.
You do not have to wet the whole sheet. Selective wetting lets one part of a cloud stay distinct while another diffuses. The full method belongs to hard and soft edges; here the decision is which part of the cloud needs which boundary.
Avoid making all the edges equally soft. A cloud can have a clear sunlit rim and a less distinct lower or trailing edge. Follow what is useful in the subject rather than adding softness as a finishing effect everywhere.
Give cloud shadows room to turn
Think of the shadow as an area within the cloud, not a dark underline. Look at its depth, direction and relationship to the light above it. Vary its width where the form changes instead of running the same grey strip beneath each white shape.
For a soft shadow, the receiving area needs to be wet, with an even sheen, when you add the colour. Keep the brush from releasing a puddle and allow the transition to develop without repeated brushing. If that area has already become damp or patchily matt, leave it to dry rather than forcing the shadow into it.
A later shadow is possible once the first wash is fully dry. Prepare the intended receiving area gently, then add colour while it is evenly wet. Earlier colour may move during rewetting, depending on the paint and paper, so avoid repeated passes and keep the adjustment limited.
There is no single correct cloud grey. Begin with a restrained mixture that relates to the sky, then adjust it against the reference. The guide to mixing neutrals covers how to change a grey without treating it as an isolated colour recipe.
Let the sky settle before adding the land
An uncomplicated strip of land can be enough to give a sky scale. Decide whether the horizon needs a clean separation or a softer meeting before painting it. For a clean boundary, allow the sky to dry fully before bringing the land colour up to it.
When a wash has a moving bead, keep the working angle until the final surplus is lifted; let the sheen go before levelling the board. Do not tip a remaining puddle back through a sky that is starting to set. The guide to managing the wash bead covers that sequence.
Once the sheen becomes lower or starts to break, the surface is damp rather than wet. More water can push into the setting colour and make a bloom or backrun. Resist chasing a small unevenness across the whole sky. Let it dry, then judge whether it actually interrupts the picture.
Common problems
| What you see | Possible cause | Useful response |
|---|---|---|
| Clouds look cut out | Every boundary is equally hard | Plan selected wet receiving areas for softer joins in the next wash |
| Clouds look like separate white blobs | Similar sizes, spacing and outlines | Group some masses and vary the spaces between them |
| Shadows look like dirty outlines | Narrow grey marks follow the whole contour | Make the shadow an internal shape with a changing width |
| The brightest lights have disappeared | Sky colour entered the areas meant to stay pale | Let it dry before judging; lifting may lighten colour but need not restore white |
| A branching rim appears during drying | Extra liquid entered a partly drying area | Stop adding water and leave the advancing edge alone |
| The sky competes with everything below it | Too many strong contrasts or small marks | Choose whether sky or land leads, then simplify the supporting area |
For a dried correction, use the lifting guide rather than scrubbing at a cloud until the paper gives way. Sometimes a slightly imperfect sky is less distracting than a conspicuous repair.
The practical verdict
The most useful change is to stop treating clouds as objects that need complete outlines. Paint the connected spaces around them, give their shadows enough shape to describe form, and keep a few edges clear while allowing others to soften.
A sky does not need to be seamless to be convincing. It needs a readable light pattern and marks that belong to the same weather. Once those relationships work, another pass of the brush may add less than leaving them alone.